How To Setup SSH Keys For Multiple Hosts
SSH is a very powerful way to access remote servers. Learn how to easily setup SSH in your system.

There are probably hundreds, even thousands of articles on this topic. And that's precisely the reason why it can also get daunting, confusing, and borderline nauseating to understand how to setup, much less use SSH as a beginner.
This post is aimed to be a no-nonsense, no-fluff guide to creating multiple SSH keys for difference Git based accounts like GitHub or BitBucket, and manage all of them easily, simultaneously.
Disclaimer: This is not an expert guide, and the steps here are simplified to ensure all levels of developers can follow. In case of any discrepancy or incorrect steps, please let me know in the comments and I would be happy to correct.
It is recommended to complete the below steps from beginning to end for one key and then repeat the process for all keys thereafter.
Step 1 - Check for existing keys
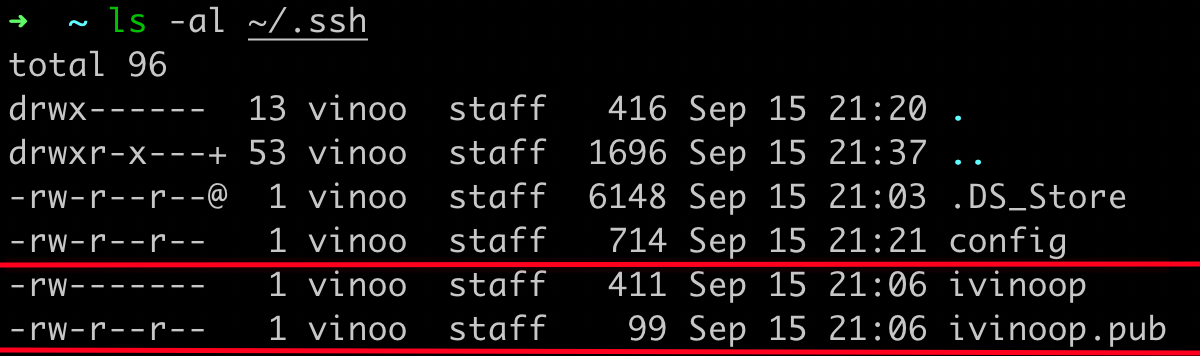
Use the command below to check if there are existing SSH keys -
ls -al ~/.ssh
If you need a clean slate and start setting up everything afresh, delete the existing entries with this command -
ssh-add -D
Note that this will only delete the manual entries previously done by you and not the ones automatically added by other agents/tools. To ensure that the
.sshfolder is empty, simply delete the contents of the folder like you normally would.
Files beginning with a dot '.' are irrelevant in this context. SSH key names look like this -
Step 2 - Generate new SSH key
Type in this command to generate a new SSH key -
ssh-keygen -t ed25519 -C "your@email.com"
Meaning of different flags in the above command -
- -t : defines the type of algorithm that generates the key; RSA, ed25519, etc. ed25519 is a more encrypted, more secure algorithm
- -C : used to define any comment to identify the particular entity who generates the key. Optional, but always recommended
Once entered, the above command generates the SSH key. Make sure you enter a unique name within the path, else the file name will default to id_rsa. Your screen should resemble like so -
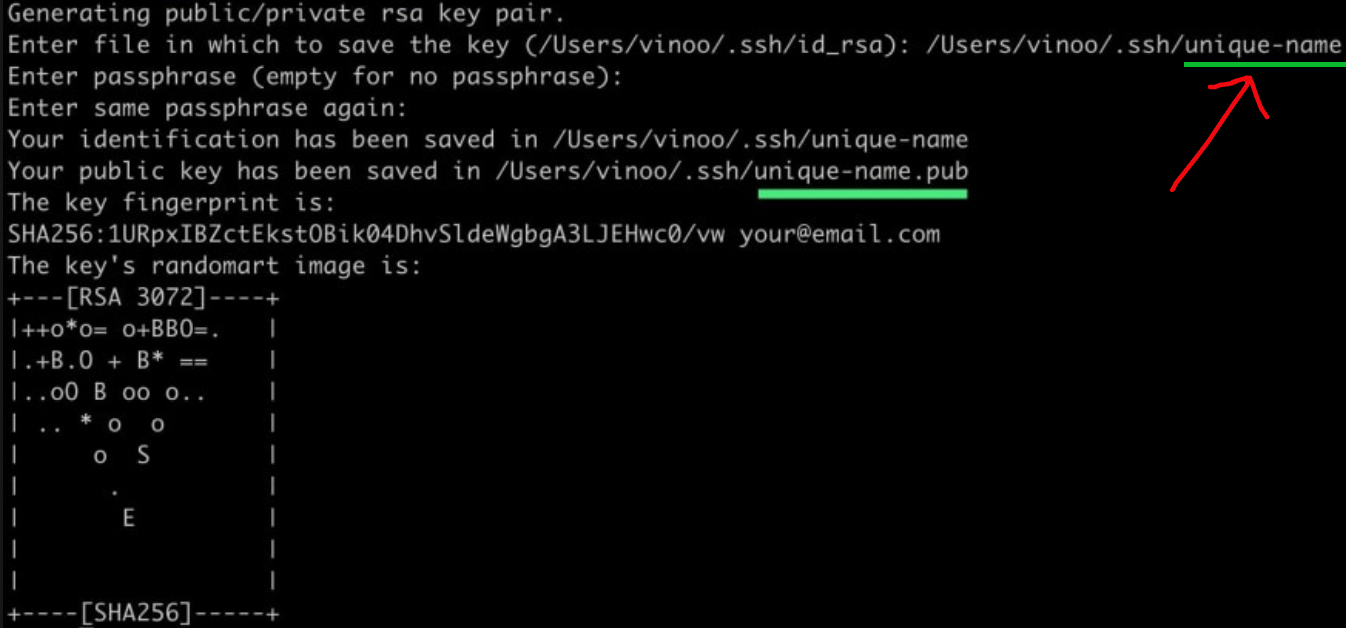
Hit Enter through the next steps (paraphrase, et al), and your keys will be generated; Two files - a private key and public key will be generated.
Step 3 - Create a known_hosts file
Nothing fancy; simply go inside the .ssh folder with cd .ssh and create a file named known_hosts_yourkeyname. This helps you easily diagnose issues should they occur in future. Use the command below to create it -
touch known_hosts_yourkeyname
Leave it untouched after this.
Step 4 - Create/Edit the config file
The config file is used to define and set options for each key and its corresponding host. Open the .ssh folder in your preferred editor and create a new file named config (without any extensions) and paste the following lines into it -
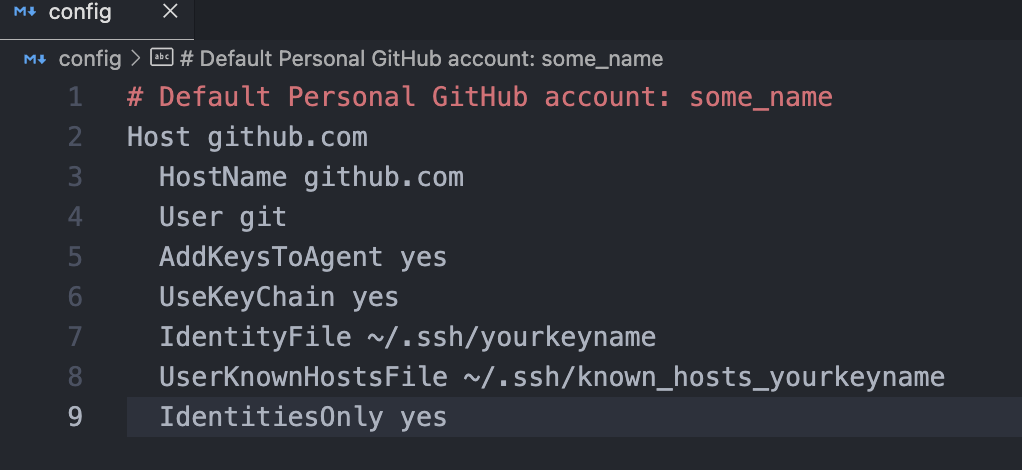
Here is a brief breakdown of what each line means -
- Host : This is used to identify each key amidst the different ones in your system. Keep it simple with the URL of the host as above.
- HostName: This is where your remote repository exists. This is what is used to match with your repo's base URL.
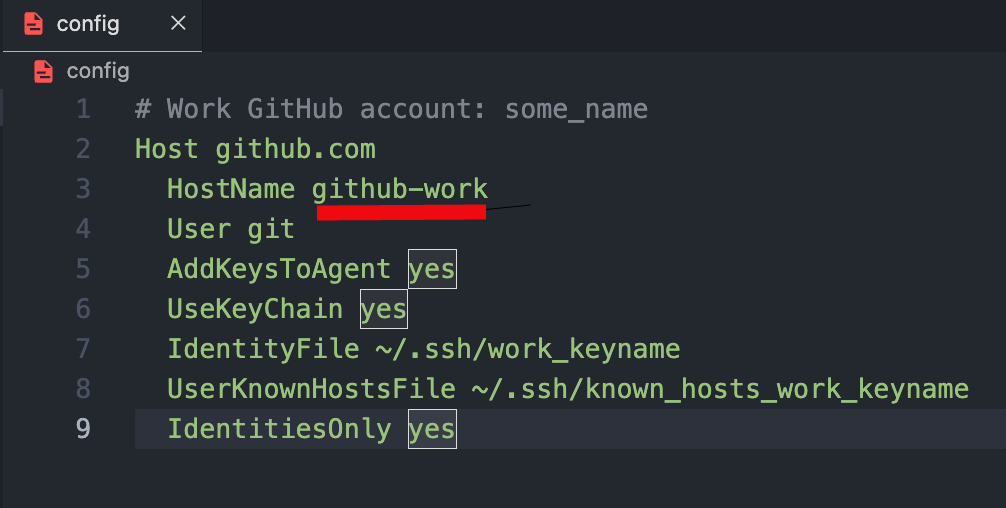
For a default SSH key which is usually a personal one, keep the HostName entry the same as the Host. For work SSH keys, you can modify the HostName like so -
- User : For git based hosts/servers, the entry will be
git. If it is a Digital Ocean Droplet or AWS instance, it may vary accordingly. - AddKeysToAgent : In a further step, we will add the SSH keys to the
ssh-agentin the system - which is a program that keeps track of identities and passwords, so that you do not have to enter your credentials each time you perform git read/write operations. In this line, we are prompting the private key to be authenticated by thessh-agent. - IdentityFile : This is the path of the SSH key
- UserKnownHostsFile : This is used to store all connections to hosts that your key connects to. Specify the name of the
known_hostsfile you created earlier using thetouchcommand. - IdentitiesOnly : This entry is used to ensure that only the specified keys are used to connect to a host, and no other.
NOTE: Once you generate more keys, you will need to simply add the same set of lines as above for those new keys. We will see an example of this at the end of the article.
Step 5 - Add the keys to ssh-agent
Enter the command below -
eval "$(ssh-agent -s)"
A unique Agent PID will be displayed which means that the ssh-agent is now running.
Next, add the keys to it -
ssh-add --apple-use-keychain ~/.ssh/your_keyname
If you are not on a Mac, do not use the --aple-use-keychain flag. This is for the newer keychain access management in MacOS versions after Monterey. If you are using an older version or are on Linux, replace it with this -
ssh-add -K ~/.ssh/your_keyname
You will get a line confirming the key was added.
Step 6 - Add the key to your host
Make sure you're inside the .ssh folder. Then, copy the contents of your public key like so -
cat your_keyname.pub | pbcopy
catis to display the contents of the public key, and simultaneously, with the pipeline operator, we usepbcopyto copy the contents to the system's clipboard.
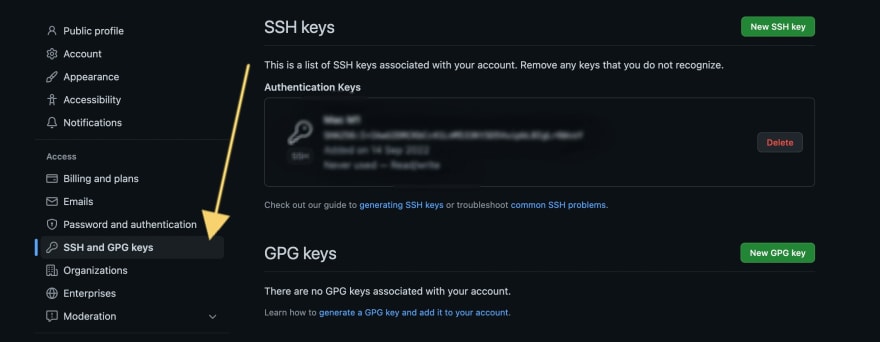
Next, add this to your host. If you are on GitHub, go to your account Settings>SSH and GPG Keys and add the key.
Step 7 - Verify and start SSHing
The last step is to verify that your configuration is up and running. Enter this command -
ssh -T git@github.com
Suppose you have repeated the process up until Step 6 for two other keys and you now have two keys, with the second key supposedly on GitHub again, and the third key on BitBucket, then your config file should look similar to this -
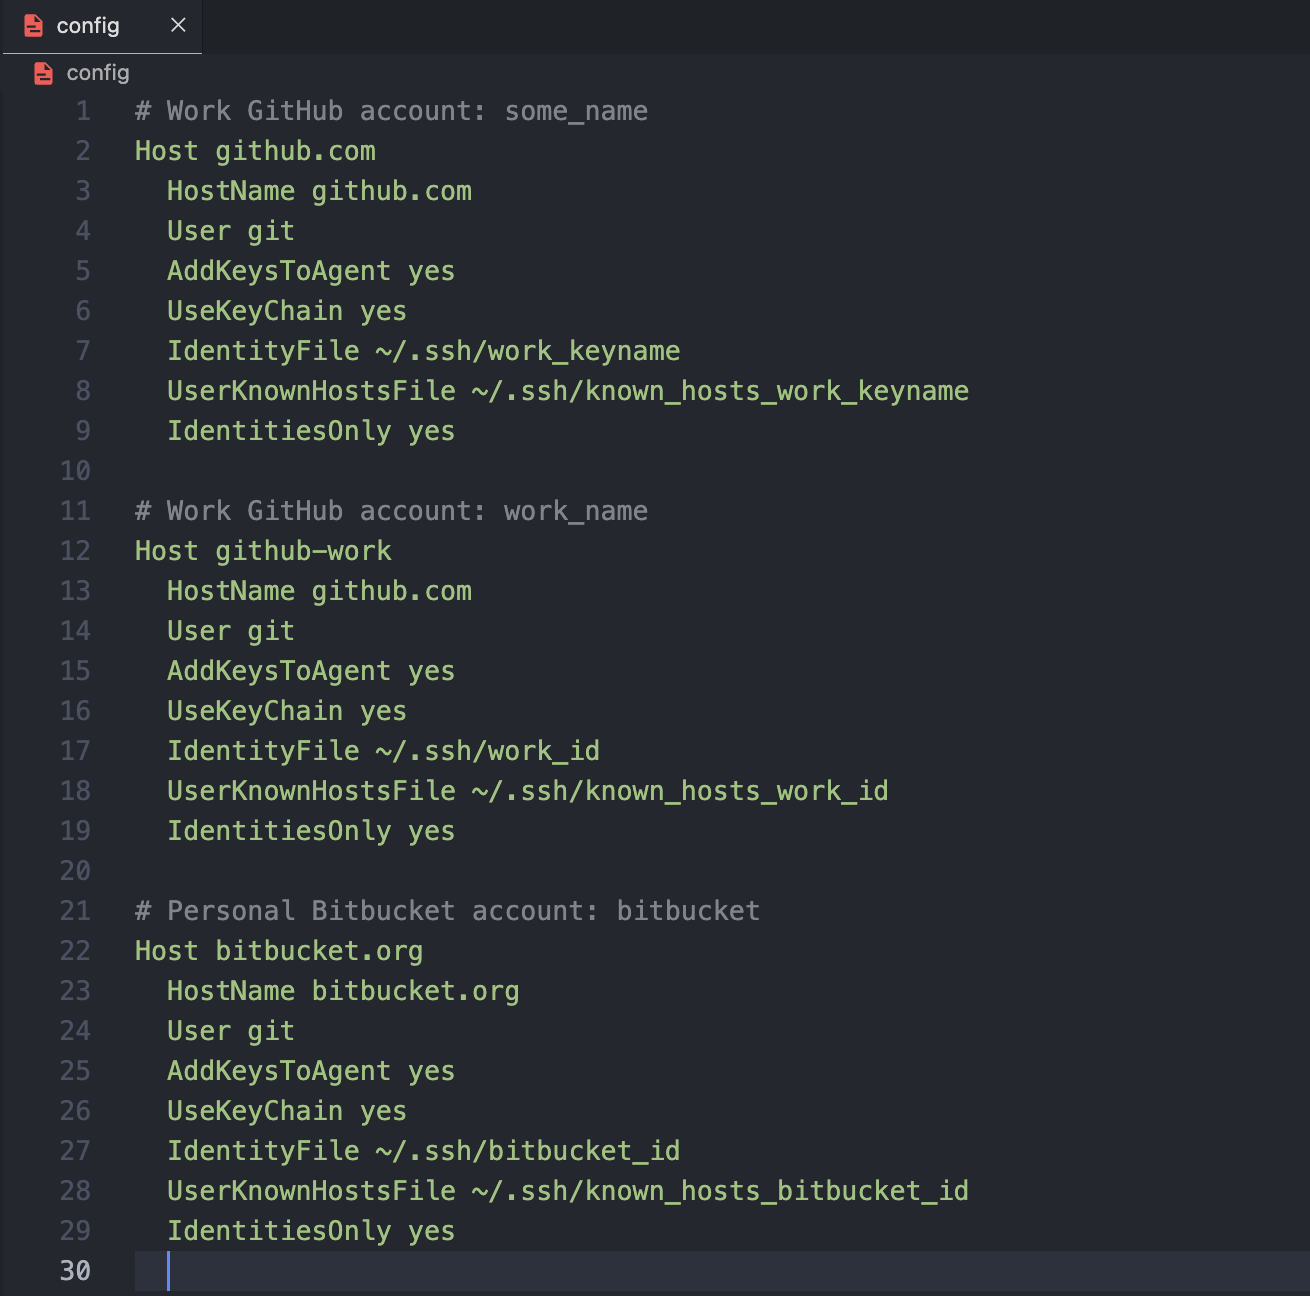
As you can see, there are multiple hosts with multiple corresponding keys and all of them are pattern matched by the ssh-agent to connect only as specified. Notice how the Host entry for GitHub work account and BitBucket account are unique.
You can now verify the configuration for all of them -
ssh -T git@github.com
ssh -T git@github-work
ssh -T git@bitbucket.org
You should get a success message for each of them indicating that authentication was successful -
Hi some_user! You've successfully authenticated, but GitHub does not provide shell access.
Voila! 🎉 You are now all set to clone your repos from the hosts you have setup.
An important thing to notice here is that in our example above, we have 2 GitHub hosts where the HostName entry points to github.com but the Host entry is kept different in order for the ssh-agent to uniquely identify each of them.
Therefore, when you are cloning a repo from the Default Personal account, you can simply type in -
git clone git@github.com:your_username/your_repo_name.git
However, when you want to clone a repo from the Work GitHub account, you would have to change the base URL of the repo after the part git@, with your corresponding Host entry, like so -
git clone git@github-work:your_username/your_repo_name.git
If it is a different host altogether like the Bitbucket one, then you can simply use the clone command like usual.
This brings us to the end of this rather long, but detailed article on how to setup multiple SSH keys for multiple hosts in your system.
Have fun setting up, and do let me know in the comments, if you have any suggestions. Until next time 🖖


